
The only thing better than a flawlessly executed event is a professional video capture to share the experience with those who were unable to attend – and memorialize success for marketing, training, and future planning.
Recording live events transforms a single moment into reusable assets—highlight reels for promotion, full-session archives for attendees, and instructional modules for teams. To get there, align purpose, coverage, AV integration, lighting, editing scope, and timelines before the show, then execute against a clear plan on site.
See examples of recorded sessions and event setups.
Step 1: Identify the purpose
Start by clarifying why the recording matters. If the goal is a highlight sizzle, the crew needs b-roll, reactions, and strong transitions. If the intent is training or on-demand learning, prioritize clean board audio, legible slides, and stable coverage that favors clarity over flair. Internal documentation may accept a simpler edit, while external distribution typically requires graphics, captions, color balance, and a higher polish. Decide early who will watch and where it will live; this directly shapes camera plans, editorial scope, and licensing choices.
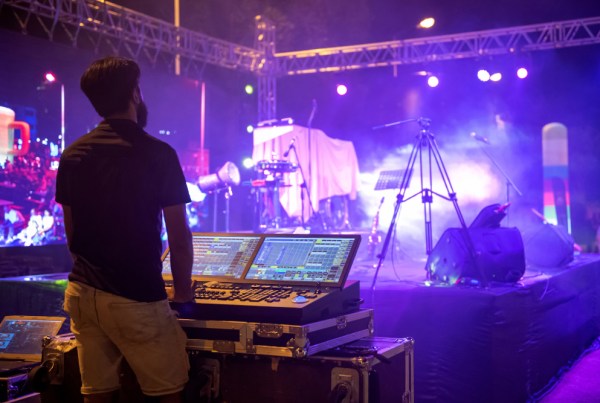
One camera, two, or three?

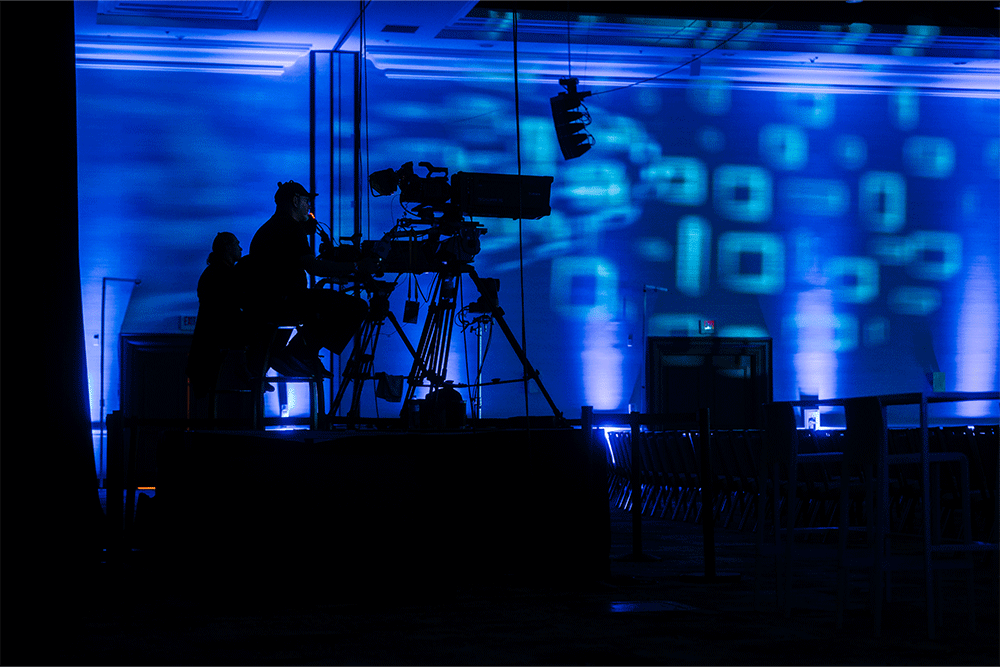
A single camera provides a wide, stable view and is the simplest, most budget-friendly approach. Two cameras add a tight roving or fixed angle that enables dynamic cuts between the stage-wide and speaker close-ups, which substantially improves edit flexibility and engagement. A third camera brings the audience into the story—capturing reactions, transitions, and panel interplay—so viewers feel like they were in the room. Choose coverage based on agenda complexity, room size, and how much editorial range is needed after the event.
Audience, rights, and distribution

Internal audiences generally tolerate lighter edits and faster turnaround, while public-facing content benefits from branded graphics, captions, music replacement, and tighter color and sound finishing. Plan for licensing-compliant music and media. Walk-in tracks, stingers, and embedded third-party clips may need to be muted or replaced with licensed or royalty-free alternatives. Align on distribution channels and file specs ahead of time so delivery is frictionless.
Deliverables, storage, and turnaround

Define exactly what will be delivered—number and length of videos, whether captions are included, graphics style, and aspect ratios for social variants. Raw footage is large by nature; agree on whether media will be provided on a drive or transferred in compressed, editor-friendly formats. If a next-day cut is required, lock scope and revision limits, and confirm that overnight editing is budgeted and staffed.
Step 2: Verify AV setup compatibility with recording

Great recordings begin with clean AV integration. Ensure the video team receives a balanced, reliable board feed and time for true soundchecks. Confirm that camera positions have protected sightlines on the floor plan and that any platforms or risers are included in the layout. Light the stage for camera—not just the room—with consistent key, fill, and backlight, matched color temperature, and minimized shadowing. Schedule a quick camera color/shading check under show lighting so skin tones and wardrobe read well on video.
Step 3: Create a shot list or storyboard

Map the moments that matter—walk-ons and walk-offs, product reveals, key transitions, award handoffs, audience reactions, and sponsor visuals. A concise storyboard clarifies openers, lower thirds, supers, callouts to slides or demos, and end cards. This reduces friction in the edit and ensures the final cut aligns with stakeholder expectations.
Step 4: Define editing scope and recording method
Agree on whether the team will produce a light edit—trimmed heads and tails with a title card—or a fully finished program with graphics, music replacement, color, captions, and multiple feedback rounds. Decide if the crew will record a live-switched program feed to accelerate turnaround, or if each camera will be captured in ISO for maximum editorial control. Program records are fast but less flexible; ISO recordings increase options and quality at the cost of storage and additional finishing time.
Equipment and roles that protect quality
Prioritize audio first with a clean board mix monitored on headphones and, where possible, a backup safety recording. Favor lavs or high-quality handhelds for presenters and consider room mics only when audience reactions are important. For video, right-size the camera count and support with stable tripods or risers, capture slides directly when legibility matters, and add a switcher if live cutting is planned. Build a crew that fits the scope: camera operators, an A1 for audio, a technical director or switcher for multi-cam, and a producer to coordinate timing, coverage, and stakeholder feedback.
Troubleshooting the most common issues
Most recording problems can be prevented with pre-show checks. Muddy or clipping audio is nearly always a gain-staging or monitoring issue; calibrate levels, monitor on headphones, and record a safety. Flicker and banding usually stem from mismatched shutter and lighting refresh; match camera settings to the lighting environment. Soft focus is best prevented with manual focus and peaking on established stage marks during rehearsal. Slide illegibility can be solved by direct feed capture or ensuring camera framing and exposure preserve screen detail; confirm native resolution and aspect ratios in advance. Shaky or obstructed shots are avoided by protecting camera sightlines and giving operators stable platforms.
Budgeting and sourcing without surprises
Camera count, operators, audio complexity, lighting for camera, switching and ISO recording, graphics and captions, revision rounds, turnaround speed, and storage/delivery method are the primary budget drivers. To stretch dollars without risking quality, prioritize intelligible audio, presenter lighting, and direct slide capture; lock content deadlines; and agree on a clear deliverables slate and revision policy. Choose an AV production service that coordinates tightly with venue AV, provides camera plots and run-of-show documents, and can scale crew and coverage to match panels, awards, or multi-track days.
FAQs
- What’s the ideal number of cameras for a conference recording?
Two cameras is a strong baseline for keynotes and panels, adding dynamism and edit flexibility; a third adds audience reactions and transitions. Choose based on agenda, room size, and deliverables.
- Is a live-switched program record enough?
Program records reduce post time but limit flexibility. ISO recording each camera preserves options to fix cuts, reactions, and timing in editing. Consider both if timeline and budget allow.
- How can audio be captured cleanly for video?
Take a balanced board feed, monitor on headphones, and record a backup safety mix. Brief presenters on mic technique and avoid clothing that rubs lavs.
- What lighting adjustments help video quality most?
A consistent presenter wash with matched color temperature, plus key/fill/back separation, reduces shadows and improves skin tone; schedule camera color/shading checks.
Recording live events succeeds when goals, coverage, AV integration, lighting, and postproduction are aligned from the start. Define deliverables, right-size camera plans, light for camera, and coordinate clean audio capture—and confirm timelines and review cycles—so the final cut matches the brief and deadlines.